How To Change Fork Oil? – Step By Step Guide

How To Change Fork Oil? – Step By Step Guide
How To Change Fork Oil - Do you remember the last time you changed engine oil? And what about fork legs, do you remember
when you last changed the fork oil? Fork oil is as important to the vehicle as engine oil. If you are planning to change
fork oil yourself here we give you an easy step guide on how to change bike fork oil.
The front fork plays an important role for long term bike performance. The front fork leg performance depends on which
fork oil you choose. Fork oil are specially designed for one function. It is available at any lubricant store as fork
oil or shock observance oil. In this article we mentioned simple step by step guide on how to change bike fork oil and
follow some precautions while changing the fork oil.
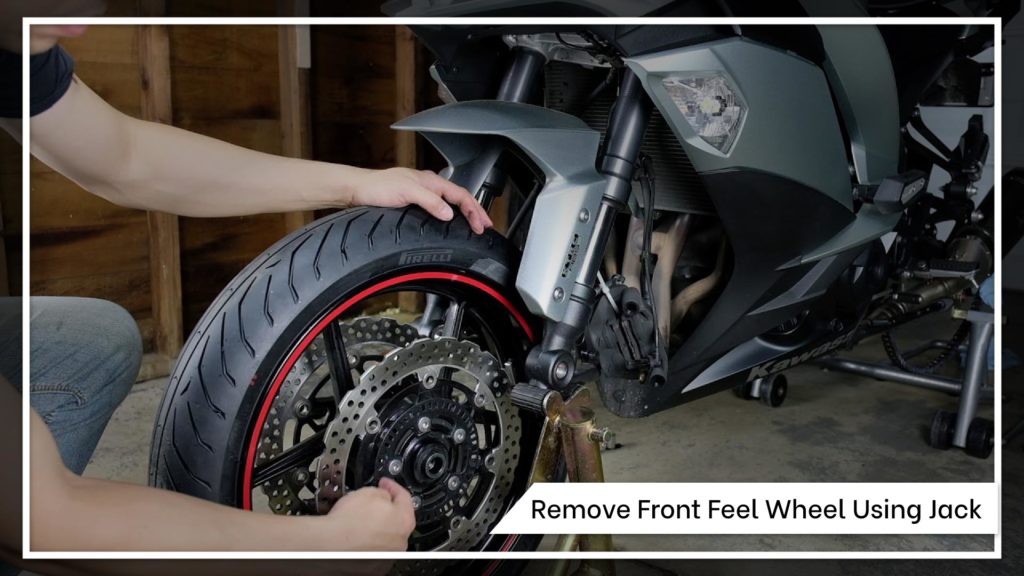

Step 1 : Remove The Front Wheel
Normally, when loosening the front axle bolts, you need to plug the front wheels or at least engage the front brakes. After releasing, you need to lift the front. There are two ways to do this. Lift the wheel using jack Another option is to use the front trigeminal tree stand, which uses the trigeminal tree to lift the bicycle. This is our preference because it provides higher stability than jacks. You also need to disconnect the brake and other cables that may be connected to the front fork, such as a speed sensor.
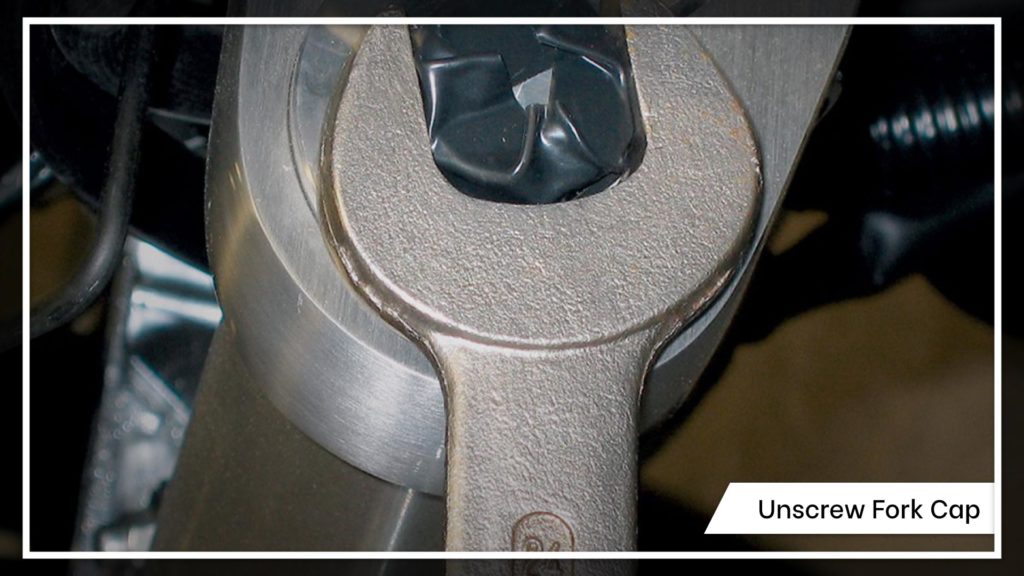
Step 2 : Unscrew Fork Cap
This is your first challenge. Depending on your bike, the front fork will have a cover that you can simply unscrew, or in rare cases, the plug will be on top. In any case, you will also need to remove a clip that is on the underside of the plug or cap. Because the bike’s front is now lifted, the fork will blur making this task a little easier. Push the cap with the appropriate tool and using your other hand, use a flat head screw driver or cutter to cut the clip out.
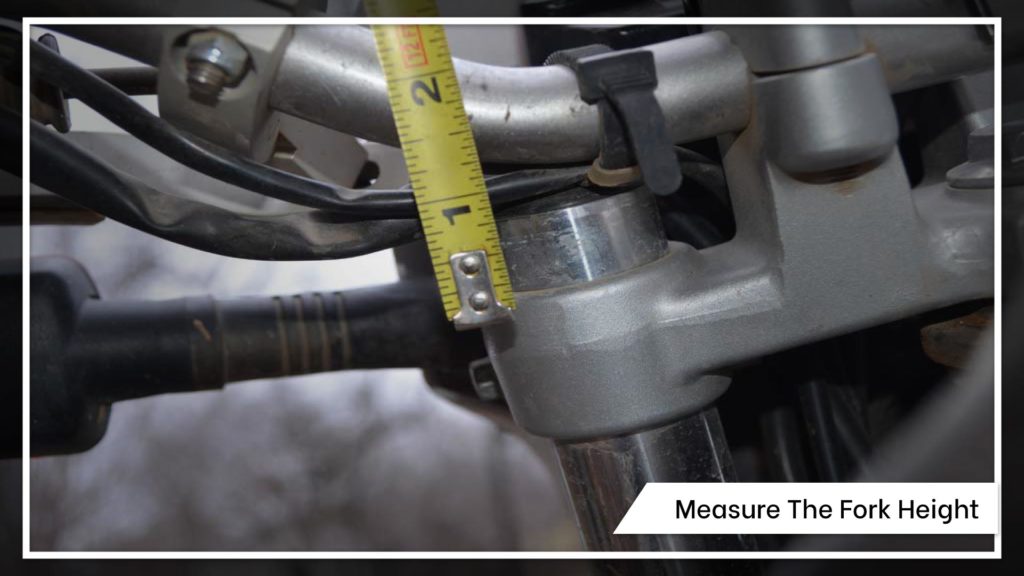
Step 3 : Measure The Fork Height
The accurate position of your front fork in the trigeminal tree determines the bike’s geometry of the front end, so it is important to measure it. Otherwise, after re-installation, your bike may be handled very differently. Using a ruler, measure the distance the fork extends above the trigeminal tree. Usually, you will find a mark on the top of the trigeminal tree-start measuring from here, because the height of the fork above the trigeminal tree will vary depending on where you are measuring.
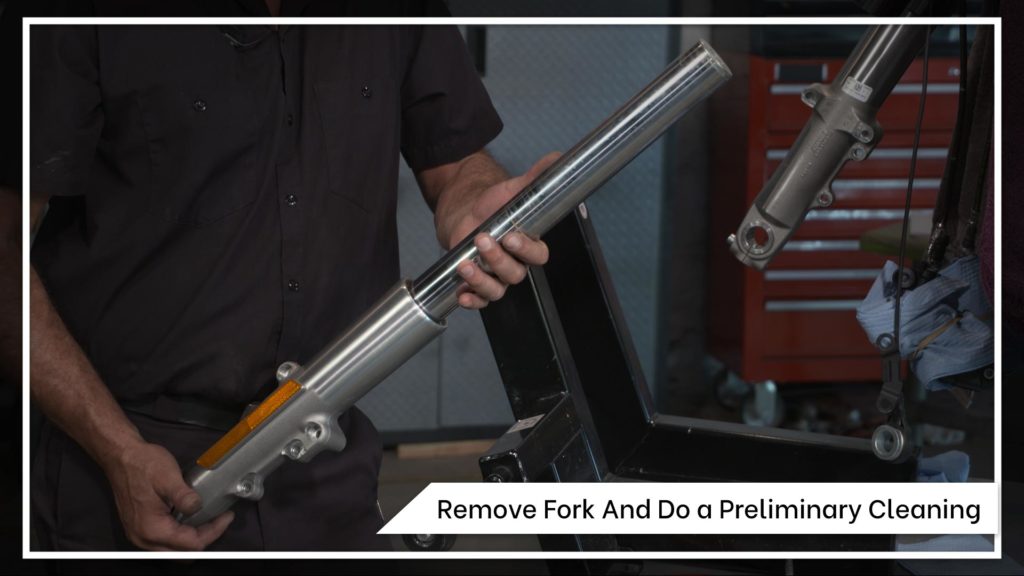
Step 4 : Remove Fork And Do a Preliminary Cleaning
Release the bolts at the top and bottom of the trigeminal tree. Once fully tightened, you can gently slide each fork off and out of the clip. When pouring oil out of the forks, do not turn them over, otherwise the spring inside may be damaged. Instead, pour the fork oil gently and make sure to grab all the washers, shims and springs when it falls. Let the spring and spacer drip into a tray, then give them a clean down with some brake cleaner. Put the fork legs upside down on the oil drain pan to drain out as much old oil as possible. Operating the fork up and down will help. After stopping dripping, spray some brake cleaner on it and rotate it to clean the inside of the fork. Prompt and repeat until it looks clean. Hang the fork upside down to dry, then take the cup.
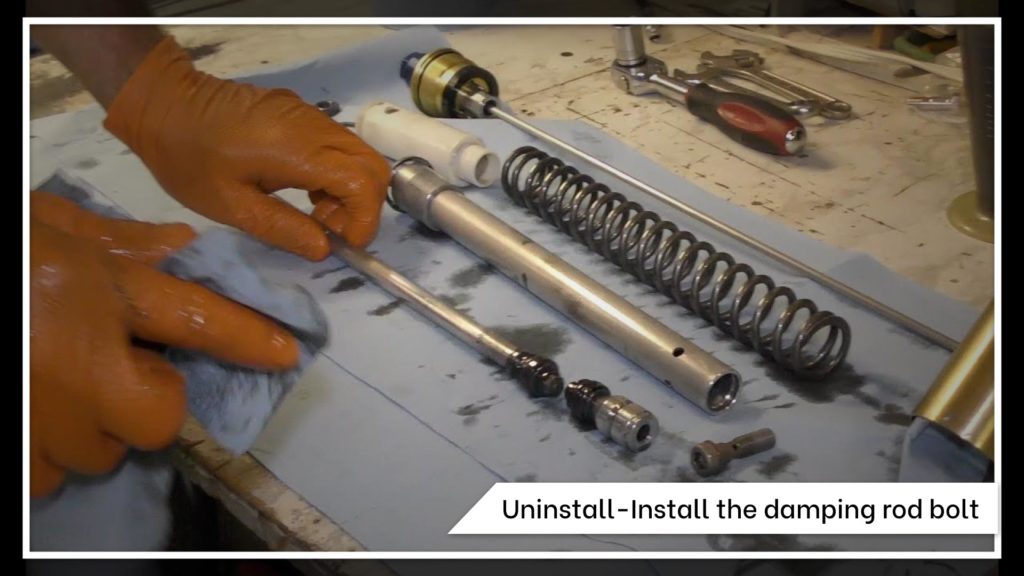
Step 5 : Uninstall and Install the damping rod bolt
Pressing the spring will hopefully hold the damper rod in place – at least enough to loosen the bolt. If this does not work, it is also possible to push a pin (or other suitably shaped and long enough object) into the top of the damping rod. After removing the bottom bolt, spray some degreaser into the front fork, and then pump up and down. Let the degreaser sit down and wash it with water. Let the fork dry. Spray degreaser on the spring, gasket and damper rod, then rinse with water. Screw some locks on the bolts that hold the damping rod in place, and then screw them in. Just like when removing the damper rod, compress the front fork and secure the damper rod in place with a spring to prevent it from rotating.
Step 6 : Replace Fork Oil
Now, the most important step for replacing the fork oil. Make sure you use the correct bike fork oil grade or “weight”. They usually have weights of 5, 7.5, 10, 12.5, and 15, you can try using heavier oil to provide greater damping, or try using lighter oil to reduce damping. Refer to your bike’s service guide for fork oil and its weight. Because in this guide we are not taking the fork completely apart, it will still have the old oil. So, there are two criteria to note – the first is the amount of oil and the second is the distance of the oil from the top of the fork. Make sure that the fork stands vertically on a horizontal surface. Pour in the amount of oil indicated by the manufacturer. Before placing it all, pump the fork up and down to spread the oil and remove any air that has spread. Now refer second measurement that will indicate how far the oil should sit from the top of the fork. The best way is to use a fork-shaped oil gauge, which is just a syringe with some fixed hoses. Simply measure the appropriate distance from the gauge ring and set it appropriately, then sit on the fork. If you pull the syringe and only inhale air, it means that you do not have enough oil. Add oil and then pull the syringe again. If you initially sucked in oil, that’s fine, and then continue to do so until you start to inhale only. Once this happens, your oil level is correct.
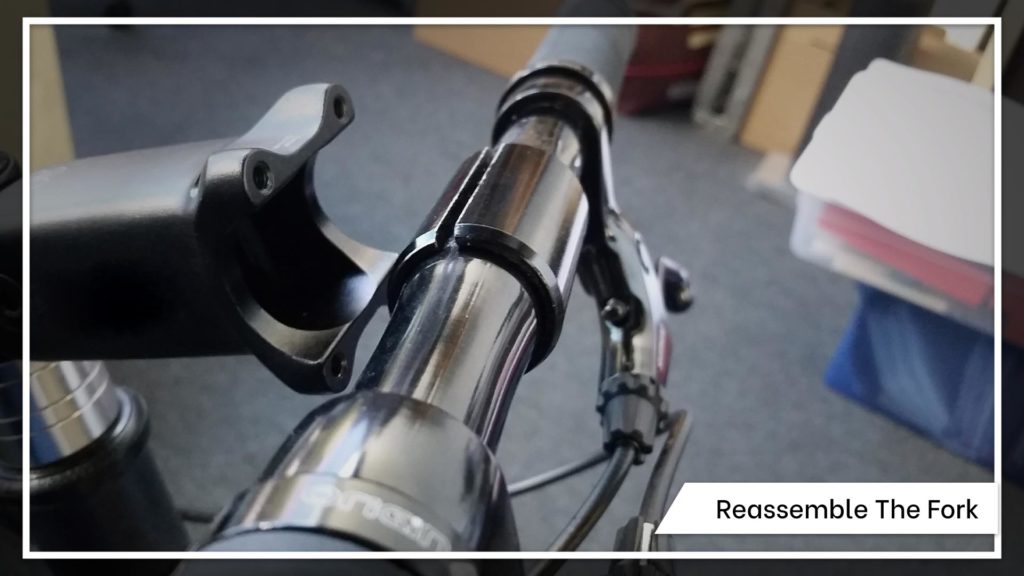
Step 7 : Reassemble The Fork
Slide the fork smoothly up the trigeminal tree. Tighten the bolts on the trigeminal tree using hand-make sure there is enough slack to move the forks up and down slightly to position them correctly. Put the spring, spacer and washer back into the fork leg and then screw back the top plug. Repeat once with the other leg, and then reinstall them, remembering that once the yoke clamp bolt is tightened, the top plug must be fully tightened. Here we have done the steps on how to change the bike fork oil!! Now same process with second front fork leg. Start And Enjoy!! Get Free DistributorshipPrecautions While Changing The Bike Fork Oil :
- please use safe and secure way to hold the bike as you remove and reinstall the fork legs.
- Modern forks do not have drain screws in the bottom. Without drains, you either suck the old oil out with a syringe or remove the fork legs and drain by holding them upside down.
- First loosen all bolts, while the front end still has weight. Just started! Lift the front end of the bike and remove the front wheels.
- The fork tube cover may be under pressure, beware the cover will fly away!
- After removing the front wheels, now is a good time to check the brake pads.
- The amount of fork oil must be accurately measured! The number of legs should be the same.
- Make a note of all the parts coming out of each fork leg and their order. Most fork springs will have one or two very thin washers on top. They are easy to miss and lose. Be careful with them.
- The last bolts to be tightened are the bottom one or two on each side of the fork leg. Make them last. Before finally tightening these bolts to the factory specifications, rebound them up and down.
- Hope You get the proper information about how to change the bike fork oil. For further detail read user manual or take an advice conversation with trusted fork oil distributor near you.